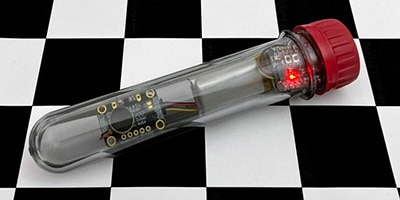
Mfr Part # 5325
STEMMA QT QT PY ESP32-S2 WIFI
Adafruit Industries LLC
License: See Original Project
Courtesy of Adafuit
Guide by Liz Clark
Overview
With all of the weather API's and display options, it can be overwhelming to decide which approach to take when building a weather display. This project takes the less is more, or smol is more, approach.
You can use the tiny yet mighty 5x5 NeoPixel Grid BFF add-on board with a QT Py ESP32-S2 to display the current weather conditions and temperature. The CircuitPython code is using the Open-Meteo API to fetch current weather data. Open-Meteo is a free and open-source weather API that does not require an API key, making it fast to get started with.
The current weather condition is shown with a 5x5 sprite on the NeoPixel Grid. There are sprites for sunny, partly cloudy, clouds, rain, thunderstorms and snow with day and night versions for each.
The current temperature scrolls across the display after showing the sprite. The color of the text changes depending on the temperature. Lower temperatures are represented with cooler colors (green, blue, and purple) and higher temperatures are represented with warmer colors (yellow, orange, and red).
Prerequisite Guides
Adafruit 5x5 NeoPixel Grid BFF
Parts
CircuitPython
CircuitPython is a derivative of MicroPython designed to simplify experimentation and education on low-cost microcontrollers. It makes it easier than ever to get prototyping by requiring no upfront desktop software downloads. Simply copy and edit files on the CIRCUITPY drive to iterate.
CircuitPython QuickStart
Follow this step-by-step to quickly get CircuitPython running on your board.
Download the latest version of CircuitPython for this board via circuitpython.org
Click the link above to download the latest CircuitPython UF2 file.
Save it wherever is convenient for you.
Plug your board into your computer, using a known-good data-sync cable, directly, or via an adapter if needed.
Click the reset button once (highlighted in red above), and then click it again when you see the RGB status LED(s) (highlighted in green above) turn purple (approximately half a second later). Sometimes it helps to think of it as a "slow double-click" of the reset button.
For this board, tap reset and wait for the LED to turn purple, and as soon as it turns purple, tap reset again. The second tap needs to happen while the LED is still purple.
Once successful, you will see the RGB status LED(s) turn green (highlighted in green above). If you see red, try another port, or if you're using an adapter or hub, try without the hub, or different adapter or hub.
If double-clicking doesn't work the first time, try again. Sometimes it can take a few tries to get the rhythm right!
A lot of people end up using charge-only USB cables and it is very frustrating! Make sure you have a USB cable you know is good for data sync.
If after several tries, and verifying your USB cable is data-ready, you still cannot get to the bootloader, it is possible that the bootloader is missing or damaged. Check out the Install UF2 Bootloader page for details on resolving this issue.
You will see a new disk drive appear called QTPYS2BOOT.
Drag the adafruit_circuitpython_etc.uf2 file to QTPYS2BOOT.
The BOOT drive will disappear, and a new disk drive called CIRCUITPY will appear.
That's it!
Create Your settings.toml File
If you've worked on WiFi projects with CircuitPython before, you're probably familiar with the secrets.py file. This file is a Python file that is stored on your CIRCUITPY drive that contains all of your secret WiFi information, such as your SSID, SSID password and any API keys for IoT services.
As of CircuitPython 8.0.0-beta.6, there is support for a settings.toml file. Similar to secrets.py, the settings.toml file separates your sensitive information from your main code.py file.
settings.toml File Example
Here is an example on how to format your settings.toml file.
# Comments are supported
CIRCUITPY_WIFI_SSID="guest wifi"
CIRCUITPY_WIFI_PASSWORD="guessable"
CIRCUITPY_WEB_API_PORT=80
CIRCUITPY_WEB_API_PASSWORD="passw0rd"
test_variable="this is a test"
thumbs_up="\U0001f44d"
In a settings.toml file, it's important to keep these factors in mind:
Strings are wrapped in double quotes; ex: "your-string-here"
Integers are not quoted and may be written in decimal with optional sign ( +1, -1, 1000) or hexadecimal (0xabcd)
Floats, octal (0o567) and binary (0b11011) are not supported
Use \u escapes for weird characters, \x and \ooo escapes are not available in .toml files
Example: \U0001f44d for thumbs up emoji and \u20ac for € (EUR sign)
Unicode emoji, and non-ASCII characters, stand for themselves as long as you're careful to save in "UTF-8 without BOM" format
When your settings.toml file is ready, you can save it in your text editor with the .toml extension.
Accessing Your settings.toml Information in code.py
In your code.py file, you'll need to import the os library to access the settings.toml file. Your settings are accessed with the os.getenv() function. You'll pass your settings entry to the function to import it into the code.py file.
import os

print(os.getenv("test_variable"))
In the upcoming CircuitPython WiFi examples, you'll see how the settings.toml file is used for connecting to your SSID and accessing your API keys.
Code the Weather Display
Once you've finished setting up your QT Py ESP32-S2 with CircuitPython, you can access the code and necessary libraries by downloading the Project Bundle.
To do this, click on the Download Project Bundle button in the window below. It will download as a zipped folder.
# SPDX-FileCopyrightText: 2022 Liz Clark for Adafruit Industries
# SPDX-License-Identifier: MIT
import os
import ssl
import time
import board
import wifi
import socketpool
import fontio
import neopixel
import simpleio
from adafruit_display_text.bitmap_label import Label
from adafruit_bitmap_font import bitmap_font
from displayio import Bitmap
from rainbowio import colorwheel
from adafruit_ticks import ticks_ms, ticks_add, ticks_diff
import adafruit_requests
from weather_codes import weather_codes
# minimum expected temperature
min_temp = 0
# maximum expected temperature
max_temp = 100
# first daylight hour
daytime_min = 7
# last daylight hour
daytime_max = 17
# latitude
lat = 42.36
# longitude
long = -71.06
# temp unit for API request
temperature_unit = "fahrenheit"
# temp unit for display
temp_unit = "F"
# API request to open-meteo
weather_url = "https://api.open-meteo.com/v1/forecast?"
# pass latitude and longitude
weather_url = "latitude=%d&longitude=%d&timezone=auto" % (lat, long)
# pass temperature_unit
weather_url = "¤t_weather=true&temperature_unit=%s&windspeed_unit=mph" % temperature_unit
# connect to SSID
wifi.radio.connect(os.getenv('CIRCUITPY_WIFI_SSID'), os.getenv('CIRCUITPY_WIFI_PASSWORD'))
pool = socketpool.SocketPool(wifi.radio)
requests = adafruit_requests.Session(pool, ssl.create_default_context())
def get_the_weather():
# make the API request
response = requests.get(weather_url)
# packs the response into a JSON
response_as_json = response.json()
print()
# prints the entire JSON
print(response_as_json)
print()
# gets current weather code
w = int(response_as_json['current_weather']['weathercode'])
# gets temperature
t = response_as_json['current_weather']['temperature']
temp_int = int(t)
t_c = simpleio.map_range(temp_int, min_temp, max_temp, 255, 0)
# gets time
json_time = response_as_json['current_weather']['time']
n_t = json_time.rsplit("T", 1)[-1]
n_t = int(n_t[:2])
return w, t, t_c, n_t
# initial API call
weather, temp, temp_color, new_time = get_the_weather()
# font edit code by Jeff Epler
tom_thumb = bitmap_font.load_font("tom-thumb.pcf", Bitmap)
_glyph_keys = ['bitmap', 'tile_index', 'width', 'height', 'dx', 'dy', 'shift_x', 'shift_y']
def patch_glyph(base, **kw):
d = {}
for k in _glyph_keys:
d[k] = kw.get(k, getattr(base, k))
return fontio.Glyph(**d)
class PatchedFont:
def __init__(self, base_font, patches):
self.base_font = base_font
self.patches = patches
def get_glyph(self, glyph):
g = self.base_font.get_glyph(glyph)
patch = self.patches.get(glyph)
if patch is not None:
#print("patching", repr(chr(glyph)), g)
g = patch_glyph(g, **patch)
#print("patched", g)
return g
def get_bounding_box(self):
return self.base_font.get_bounding_box()
font = PatchedFont(tom_thumb,
{
32: {'shift_x': 1, 'dx': 0},
105: {'dx': 0, 'shift_x': 2},
33: {'dx': 0, 'shift_x': 2},
})
# thank you Jeff for this PatchedFont() function!
# temperature for scrolling text
label = Label(text=" %s°%s " % (temp, temp_unit), font=font)
text = label.bitmap
# create 5x5 neopixels
pixels = neopixel.NeoPixel(board.A3, 5*5, brightness=.08, auto_write=False)
# count for pixels when drawing bitmaps
count = 0
# arrays to pack assets from weather_codes helper
# weather condition code
codes = []
# bitmaps for daytime
day_images = []
# bitmaps for nighttime
night_images = []
for i in weather_codes:
codes.append(i['code'])
day_images.append(i['day_img'])
night_images.append(i['night_img'])
# checks if it's day or night based on hour
def day_or_night(t):
if t in range(daytime_min, daytime_max):
z = day_images[weather]
else:
z = night_images[weather]
return z
# initial sprite selection
img = day_or_night(new_time)
# draw bitmap sprite
def draw_sprite(c):
for pixel in img:
pixels[c] = pixel
pixels.show()
c = 1
time.sleep(0.001)
c = 0
# ticks time tracker
clock = ticks_ms()
# 15 minutes in milliseconds
weather_check = 900000
# display current weather sprite & scroll temperature
while True:
# checks the time
if ticks_diff(ticks_ms(), clock) > weather_check:
print("pinging Open-Meteo")
# make the API request with function
# return weather ID, temp, temp color & hour
weather, temp, temp_color, new_time = get_the_weather()
# checks if it's day or night based on hour
# & returns day or night version of sprite
img = day_or_night(new_time)
label.text = " %s°%s " % (temp, temp_unit)
# reset clock
clock = ticks_add(clock, weather_check)
# draw bitmap sprite
draw_sprite(count)
# blocking delay to hold the sprite on the display
time.sleep(5)
# draw scrolling text
for v in range(2):
for i in range(text.width):
# Scoot the old text left by 1 pixel
pixels[:20] = pixels[5:]
# adjust color based on temperature
color = colorwheel(temp_color)
# Draw in the next line of text
for y in range(5):
# Select black or color depending on the bitmap pixel
pixels[20 y] = color * text[i,y]
pixels.show()
time.sleep(.1)Upload the Code and Libraries to the QT Py ESP32-S2
After downloading the Project Bundle, plug your QT Py ESP32-S2 into the computer's USB port with a known good USB data power cable. You should see a new flash drive appear in the computer's File Explorer or Finder (depending on your operating system) called CIRCUITPY. Unzip the folder and copy the following items to the QT Py ESP32-S2's CIRCUITPY drive.
lib folder
code.py
weather_codes.py
Your QT Py ESP32-S2 CIRCUITPY drive should look like this after copying the lib folder, weather_codes.py file and the code.py file.
Add Your settings.toml File
As of CircuitPython 8.0.0, there is support for Environment Variables. These Environmental Variables are stored in a settings.toml file. Similar to secrets.py, the settings.toml file separates your sensitive information from your main code.py file. Add your settings.toml file as described in the Create Your settings.toml File page earlier in this guide. You'll need to include your CIRCUITPY_WIFI_SSID and CIRCUITPY_WIFI_PASSWORD.
CIRCUITPY_WIFI_SSID = "your-ssid-here"
CIRCUITPY_WIFI_PASSWORD = "your-ssid-password-here"
The weather_codes.py File
The weather_codes.py file is a helper file that contains the sprite information and assigns the sprites to the weather condition codes that will be returned from Open-Meteo.
The file begins by defining RGB color values that will be used to create the sprites.
y = (255, 125, 0)
o = (0, 0, 0)
a = (0, 75, 125)
w = (255, 255, 255)
v = (127, 0, 255)
b = (0, 0, 255)
z = (0, 0, 25)
g = (25, 25, 25)
The sprites are defined as five-by-five arrays. In total, there are eleven sprite arrays.
sun_bitmap = [
    y,a,y,a,y,
    a,y,y,y,a,
    y,y,y,y,y,
    a,y,y,y,a,
    y,a,y,a,y,
]
cloud_bitmap = [
    a,a,a,w,a,
    a,w,w,w,a,
    a,w,w,w,a,
    a,a,w,w,a,
    a,a,a,w,a,
]
# etc
weather_codes is a dictionary that contains the weather codes and the associated daytime and nighttime sprite. The codes are WMO Codes as defined by NOAA. There are 100 possible codes, ranging from 0 to 99. In code.py, these weather codes are used as indexes to access the appropriate sprite.
weather_codes = [
{"code" : 0, "day_img" : sun_bitmap, "night_img" : night_bitmap},
{"code" : 1, "day_img" : sun_bitmap, "night_img" : night_bitmap},
{"code" : 2, "day_img" : sun_bitmap, "night_img" : night_bitmap},
  ...
{"code" : 99, "day_img" : thunder_bitmap, "night_img" : nightThunder_bitmap}
]
How the CircuitPython Code Works
At the top of the code are variables that can be edited to customize your code.py file for your needs. min_temp and max_temp are used in the map_range() function that determine the color of the temperature text. The min_temp number can be negative if you are in a colder climate. daytime_min and daytime_max are used to determine the hours in which a daytime sprite is shown versus a nighttime sprite. lat and long hold your location's latitude and longitude. Finally, temperature_unit and temp_unit hold either Fahrenheit or Celsius.
# minimum expected temperature
min_temp = 0
# maximum expected temperature
max_temp = 100
# first daylight hour
daytime_min = 7
# last daylight hour
daytime_max = 17
# latitude
lat = 42.36
# longitude
long = -71.06
# temp unit for API request
temperature_unit = "fahrenheit"
# temp unit for display
temp_unit = "F"
The Request URL
The API request to Open-Meteo is passed as a URL. lat, long and temperature_unit are passed to the URL string. Open-Meteo has documentation with more information on building a URL for an API request.
# API request to open-meteo
weather_url = "https://api.open-meteo.com/v1/forecast?"
# pass latitude and longitude
weather_url  = "latitude=%d&longitude=%d&timezone=auto" % (lat, long)
# pass temperature_unit
weather_url  = "¤t_weather=true&temperature_unit=%s&windspeed_unit=mph" % temperature_unit
Get the Weather
The function get_the_weather() is used to make the API request and return values for the current weather condition, temperature, the color mapped to the current temperature and the current time.
def get_the_weather():
    # make the API request
    response = requests.get(weather_url)
    # packs the response into a JSON
    response_as_json = response.json()
    print()
    # prints the entire JSON
    print(response_as_json)
    print()
    # gets current weather code
    w = int(response_as_json['current_weather']['weathercode'])
    # gets temperature
    t = response_as_json['current_weather']['temperature']
    temp_int = int(t)
    t_c = simpleio.map_range(temp_int, min_temp, max_temp, 255, 0)
    # gets time
    json_time = response_as_json['current_weather']['time']
    n_t = json_time.rsplit("T", 1)[-1]
    n_t = int(n_t[:2])
    return w, t, t_c, n_t

# initial API call
weather, temp, temp_color, new_time = get_the_weather()
Import the Sprites
A for statement packs the list entries from weather_codes into three different arrays: codes for the weather code numbers, day_images for the daytime sprites and night_images for the nighttime sprites.
for i in weather_codes:
    codes.append(i['code'])
    day_images.append(i['day_img'])
    night_images.append(i['night_img'])
Day or Night?
The function day_or_night() determines which sprite is shown based on the weather condition and time of day.
# checks if it's day or night based on hour
def day_or_night(t):
    if t in range(daytime_min, daytime_max):
        z = day_images[weather]
    else:
        z = night_images[weather]
    return z

# initial sprite selection
img = day_or_night(new_time)
Draw the Sprite
The draw_sprite() function draws the weather sprite to the 5x5 grid of NeoPixels.
# draw bitmap sprite
def draw_sprite(c):
    for pixel in img:
        pixels[c] = pixel
        pixels.show()
        c  = 1
        time.sleep(0.001)
    c = 0
Tick, tick, tick...
For tracking time, the ticks library is used. ticks manages time in milliseconds, rather than seconds like in time.monotonic(). The API will be called every fifteen minutes, or every 900000 milliseconds.
# ticks time tracker
clock = ticks_ms()

# 15 minutes in milliseconds
weather_check = 900000
The Loop
In the loop, the API is called every 15 minutes. The sprite and scrolling temperature text is updated depending on the data that is returned.
# checks the time
    if ticks_diff(ticks_ms(), clock) > weather_check:
        print("pinging Open-Meteo")
        # make the API request with function
        # return weather ID, temp, temp color & hour
        weather, temp, temp_color, new_time = get_the_weather()
        # checks if it's day or night based on hour
        # & returns day or night version of sprite
        img = day_or_night(new_time)
        label.text = "   %s°%s   " % (temp, temp_unit)
        # reset clock
        clock = ticks_add(clock, weather_check)
Scroll the Weather
The core functionality of the display loops continuously. The sprite is drawn to the 5x5 grid and is shown for five seconds. Then, the temperature text is scrolled across the display. Once the text finishes scrolling, the process begins again by drawing the sprite.
# draw bitmap sprite
    draw_sprite(count)
    # blocking delay to hold the sprite on the display
    time.sleep(5)
    # draw scrolling text
    for v in range(2):
        for i in range(text.width):
            # Scoot the old text left by 1 pixel
            pixels[:20] = pixels[5:]
            # adjust color based on temperature
            color = colorwheel(temp_color)
            # Draw in the next line of text
            for y in range(5):
                # Select black or color depending on the bitmap pixel
                pixels[20 y] = color * text[i,y]
            pixels.show()
time.sleep(.1)3D Printing
The weather display may be assembled with 3D printed parts, described below. The case has two parts: a cloud-shaped lid and a case to house the boards. Both parts print without supports.
The STL files can be downloaded directly here, from Thingiverse or from Printables.
5x5WeatherDisplaySTLfiles.zip
The main case has cutouts for the QT Py USB C port and the reset and boot buttons on the back. It has tiny holes to mount the QT Py header pins to keep the boards properly secured in the case.
The cloud lid has an opening for the 5x5 NeoPixel Grid. Its snap fits onto the main case.
Assembly
Solder socket headers to the 5x5 NeoPixel Grid BFF and solder plug headers to the QT Py ESP32-S2.
Plug the QT Py ESP32-S2 into the NeoPixel Grid BFF. Make sure that the QT Py USB port is oriented properly by referencing the USB labeling and arrow on the back of the BFF.
Insert the boards into the main case by lining up the QT Py header pins with the header pin slots in the bottom of the case.
The boards should be situated in the center of the case with the QT Py USB port accessible via the side cutout.
Close the case with the cloud lid. Make sure that the 5x5 NeoPixel Grid is centered in the cloud's cutout.
That completes the assembly!
Usage
To use the weather display, plug the QT Py ESP32-S2 into a USB-C cable to power it. After connecting to your SSID / WiFi, the QT Py will make a request to the Open-Meteo API and display the current weather condition sprite and the current temperature.
As the incoming data changes from the API, the displayed sprite and temperature reading will update. Additionally, the sprite will change depending on the time of day as each sprite has a daytime and nighttime version.
Update Your Latitude and Longitude
Open-Meteo uses latitude and longitude to pinpoint your location's weather. You can update these values to match your location at the top of the code.py file.
You can use Google Maps to find the latitude and longitude of your location. Search your location and then right-click on the map. The latitude and longitude will appear in a pop-up window on the screen.
Customize the API Request
You can customize the Open-Meteo API request by changing the parameters in the URL. Open-Meteo has documentation and a URL builder to track various pieces of weather data.